Asterisk Tutorial
From Luke Jackson
(diff) ←Older revision | Current revision | Newer revision→ (diff)
To learn more about Asterisk and its partners you can visit their website at Asterisk.org.
Contents |
Softphones
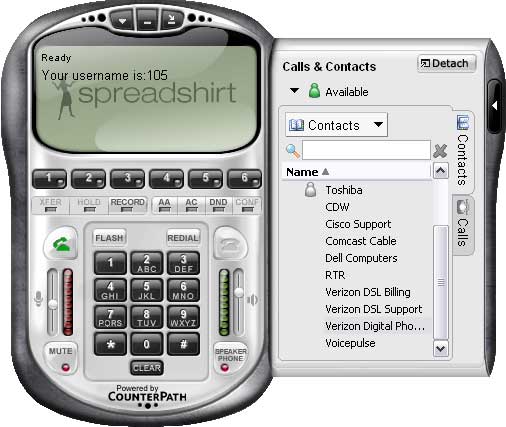
Displayed on the right is a picture of the Eyebeam softphone with its phone book extended.
For an example of CounterPath's product support click here -> Eyebeam
For more information on using Eyebeam and the FREE X-Lite please visit CounterPath's website.
Web
For your convenience there is a web based system for reviewing and managing your voice messages.
Web based voicemail http://192.168.1.10/recordings/
The IP above should be replaced with that of your server.
You will be prompted for the following information...
- Username: <extension>
- Password: 1234 (Default)
By default you will receive a eMail message each time you receive a voice mail from the Asterisk system. This eMaill will contain some simple information about the message and a link to retrieve it. Eventually it would be nice to just attach the sound file to the email but this would require a localized eMail server for each Asterisk system and as of current is not a priority.
Transferring Calls
Softphone
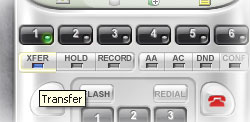
To transfer a call to any extension press the blue transfer button (XFER) located on the top left of your phone, enter the desired extension and press the blue transfer button again or enter to transfer the call.
Hardphone
To transfer a call to any extension
- Mute the phone if possible
- Press the # key and wait for the automated "transfer" response
- Enter the desired extension number on the keypad
If the call was transferred correctly you will instantly hear a busy tone once you hear this tone it is safe to hang up.
Direct To Voicemail
To transfer directly to voicemail use the same procedure as above but prefix the extension number with a *.
Voicemail
Setup
To configure your mailbox for the first time there are 4 things you must do.
- Record your unavailable message
- Record your busy message
- Record your name for the directory
- Change your password
Unavailable Message This is the message to be played when your computer is on and you are logged into Eyebeam but do not answer your phone. To record this message log into your mailbox and press 0 to configure mailbox options. Choose 1 to record your unavailable message and follow the automated instructions.
Busy Message This is the message that will be played when you are not logged into Eyebeam. This means that if you shut your computer down this is the message that will be played. To record this message log into your mailbox and press 0 to configure mailbox options. Choose 2 to record your busy message and follow the automated instructions.
Record Your Name This is the name that will be heard in the company directory. To record your name log into your mailbox and press 0 to configure mailbox options. Choose 3 to record your name and follow the automated instructions.
Change Your Password Your default password is 1234 to change this password log into your mailbox and press 0 to configure mailbox options. Next choose 5 to change your password and follow the automated instructions.
Internally
To check your voicemail from your own extension simply click on the envelope as displayed in the picture to your right. You can also dial *97 to reach your mail. Once you are connected you will be prompted for the following information...
- Password: 1234 (Default)
To check your voice mail using any internal extension you may call the Message Center at *98 you will be prompted for the following information...
- Username: <extension>
- Password: 1234 (Default)
Externally
Since each Asterisk system operates independent from the others you can only check your voicemail if you are connected internally at your primary location. However with a Cisco VPN client it is possible to bypass this requirement.
Conferences
By default each location is configured with a public conference room at <LOCATION_CODE>95. The location code is simply the first number of your extension. So if your extension is 100 you would replace the <LOCATION_CODE> with a 1.
FAQs
How do I locate an employee's extension?
- Dial *411 from any internal office extension and follow the instructions of the automated system.
- Dial the external number and press the # key when prompted and follow the instructions of the automated system.
Categories: Linux | Mac OS X | VoIP


