Mac OS X SCP (GUI)
From Luke Jackson
(diff) ←Older revision | Current revision | Newer revision→ (diff)
Contents |
Summary
There is no built-in Graphical User Interface (GUI) client for scp on Mac OS X.
There for this tutorial demonstrates how to configure your Mac for GUI based scp.
Requirements
- Mac OS X 10.4.X+
- Built-in Terminal Application
- SSH-Agent GUI Client - Download
- Fugu GUI SCP Client - Download
Configuration
Please follow the steps below.
Generate Key-Pair
You must create a key-pair in order to access the server. You can do this via the Terminal Application that is found under Applications => Utilities (Programme => Dienstprogramme).
Once you start the Terminal you should see a prompt similar to the one below:
ljackson-PowerBook:~ ljackson$
The important data is directly after the : ~ this is your working directory and this will change depending on you current location on the disk.
So now we will test to see if the folder .ssh exists on your system:
cd .ssh
If you receive a response like below you will have to create the folder with the command below. If your working path has changed to ~/.ssh then the folder already exists and you can continue with the next step.
-bash: cd: .ssh: No such file or directory
mkdir .ssh
cd .ssh
If your prompt now reads ~/.ssh you are ready to create your key-pair.
Type the command below replacing <prefix> with your login to start the ssh-keygen script:
ssh-keygen -f spreadshirt.<prefix> -t dsa -b 1024
You will be prompted to enter a passphrase THIS IS IMPORTANT!!! If you forget your passphrase the key pair is lost forever please choose a passphrase you will not forget!
Generating public/private dsa key pair.
Enter passphrase (empty for no passphrase): ***********
Enter same passphrase again: ***********
Your identification has been saved in spreadshirt.lja.
Your public key has been saved in spreadshirt.lja.pub.
The key fingerprint is:
ec:d9:9e:a0:ae:19:f3:96:f1:c4:f8:a0:ef:e0:34:84 ljackson@ljackson-PowerBook.local
You should now have 2 files in your ~/.ssh directory:
- spreadshirt.<prefix> - Private Key
- spreadshirt.<prefix>.pub - Public Key
You can move the public key file into your user directory as it will need to be put on the server.
Do so with the command below:
mv spreadshirt.<prefix> ../
Install SSH-Agent
Install the SSH-Agent you downloaded from the requirements section.
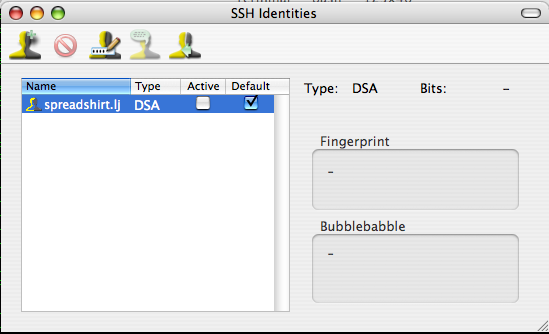
You will have to launch the application and configure some settings before it is ready for use. Click on View from the menu and select Show SSH Identities. Find your identity file spreadshirt.<prefix> and ensure Default is checked. Next select SSH Agent from the menu and choose Preferences. Ensure that Activate Default Identities is enabled when launched. Close SSH-Agent.
It may be useful to have on the dock, this way you can easily activate keys by simply clicking once and entering your passphrase.
Launch SSH-Agent one last time and it should prompt you for your passphrase and activate your ID. Once this is completed you can close the Identities window and continue with Fugu.
Install Fugu
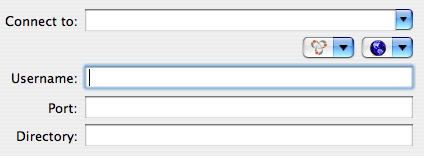
Once you have installed Fugu simply enter the server name in the Connect field and the port number in the Port field. (This should usually be port 22.)
If everything worked correctly and your public-key has been properly configured on the server Fugu should work with SSH-Agent to give you GUI based access to the server.

